Disclaimer: i am not an expert in anything. i don't have a degree in nutrition or biology. i'm not certified in anything. i'm just a regular mom who wanted to get in shape and this is just my honest experience.

Saturday, September 27, 2014

Progress update

This first picture shows the progress made my first 2 weeks into a ketogenic diet. I did not exercise.

This picture shoes my muscle progression. 

Just a shot of me in the mirror. 

Measurements. Interestingly enough most of the change came after July. From August till now. 


Wednesday, September 24, 2014

Flourless Brownies by jesspaigelchf

I'm not gonna say a whole hell of a lot here. I saw this recipe on JessPaigeLCHF's instagram and decided to give it a whirl because, brownies. Made this and it was delicious!!!

I wanna go on record as saying a couple of things though.

1. I didn't have the sweetener she listed so I used one from Whole Foods and it gave the brownies a nasty sickly sweet aftertaste. So the next time around I used Ideal Sweetener which I have used for years and it's always been great in my recipes with no detection. Of course if you have Swerve which is what she lists in the recipe, by all means, use it. My husband said my 2nd batch was much better with no aftertaste. All he tasted was the bitterness of the dark chocolate.

2. Texture. These aren't chewy brownies. They're wet fudgy brownies. But they're really chocolately yumminess.

3. Cooking times. Both times making this recipe I noticed that the brownies took a lot longer to set than 30 min. My first batch i baked for 1hour just to get the top to not be wobbly. Of course I put the entire batch into one 8x8 inch dish. The 2nd time I split it into 2 dishes. The tops set in the 30 min and cracked (like cheesecake will do in the oven) so I removed them. Still very wet under the surface. I let them set in the fridge overnight. My husband said they're much better that way. Just remember #2, texture. Flavorwise they are dark chocolately goodness. But they are wet, almost mousse-like on your tongue. At least when I made them. You may wanna tinker with cooking times, temps, and thickness.

4. This recipe has LOTS of butter in it. So if you're watching your fats take heed. But if you're doing low carb high fat, its perfect. Also, this uses a non sugar sweetener. If you aren't comfortable with that you can try honey, agave, coconut sugar, whatever your natural heart desires. But take into account that it could mess with the texture. so maybe split up the batch. Also buy more than one bar of chocolate. I bought 2 and they came in handy bc i tossed my first batch and used the other bar to make my 2nd.


To get the recipe for these flourless brownies go here.

Accidental Low Carb Tortilla

I'm not gonna lie. Last night's dinner started out as a fail. I offered to make my husband mexican pizza (to which he delighted, because who doesn't love mexican pizza?) only to realize, damn I can't enjoy the goodness of crispy tortillas. Back when I used to eat Taco Bell, mexican pizza was my favorite thing on the menu. So I thought to myself, well maybe I can whip up some suitable substitute using these flours I have. Then I remembered I tried a keto friendly tortilla a while back with disastrous results. But you know, after that pizza crust I was feeling a little cocky. So I'm like, I'm a low carb genius, I'll just add some of this and some of this and hit it with a little of this....and....and....FAIL FAIL FAIL. I said fine. I'll just have meat and some avocado or whatever. No biggie.

So as i'm sauteing my meat with some cilantro (because i'm a cilantro whore. cilantro and green onions are basically in all of my dishes) and seeing the leftover little bits of cheese crust up in the pan  I got an idea. I got a perfectly awful idea (the Grinch. anyone?). I removed the meat from the pan and took a handful of shredded cheese and placed it in the center of the pan. It started to melt and bubble but it stayed together. I flipped it and let it do the same on the other side. The first one I placed on the plate. I figured I could use it for some plating and place it leaning over the meat or something. Like some kind of gourmet shit. Because let's face it, 90% of my cooking is to post a picture on instagram. #foodporn Then I topped it with avocados and green onions and a heaping dollop of chipotle mayo. I love that shit. And yeah, its aight. Kinda sloppy, but I was too hungry to care.


Since this was my base "tortilla" I decided to make another to place on top. Only this time as I took it out of the pan and placed it on the plate I used a spatula to fold it in half. I was surprised at how pliable it was. And just like that it stayed in that shape. So I made a taco out of it!! Some meat, taco sauce (i felt more cheese would have been redundant but don't let that stop you) and topped it with a piece of lettuce. And guess what? It tasted like a real taco!!!!


I was so excited!!! A tortilla made from cheese? Really? You can't get anymore keto than that shit. But I was sure as soon as I took a bite it would crackle and fall apart. Only, it didn't. It kept its shape the entire time. It was a little more chewy than crispy. But it got the job done.


Will I be making this again? You bet your sweet aunt bippy!! Only next time I'll make a bigger "tortilla" and hit it with some mexican spices to up the ante.

And there you have it folks. A suitable (cheap and easy) alternative to real tortillas.  If your venture into low-carb-tortilla-making fails, you can always use this bad boy. I'm still gonna try other recipes because I love that shit. Experimenting and weeding out the good from the bad and sharing it with my peoples. I do the work so you don't have to! ;)

Tuesday, September 23, 2014

Yes! You can haz pizza!!!! Meli's low carb pizza crust recipe.

Ok guys, let me preface this by saying I've been living la vida low carb on and off for 4yrs. In that time I have tried MANY low carb pizza recipes. Cauliflower pizza crust. FAIL. Zuchinni pizza crust, better tasting, terrible structurally. All cheese crust, well, you get the idea. So I pretty much gave up on it. But since being on hiatus from low carb and recently going  back, i see there have been some improvements in the world of low carb pizza technology. I'm finding recipes that are different from those old ones. I'm leery of anything that has almond flour as the bulk of the recipe bc in my low carb experimenting days i ate many BAD cookies and breads made with almond flour. The texture is.....its ground up nuts, dude. I've found that mixing different flours (almond, coconut, garbanzo) always yielded the best results for me. That too took mucho experimentation. Like, now I know not to use soy flour, the taste is gnarly. And i'm very cautious with coconut flour as the need to add copious amounts of eggs and liquids to counteract the dryness of the flour can be very hit or miss. Experiments fail, but when you've used half a carton of eggs and have to throw it away, its so fucking wasteful! Ingredients ain't cheap baby boo. Especially with these flours, and if you're buying your cage free organic eggs, fuck that. $$$$. 


Anyway I say that to say this. I found 2 recipes that peaked my interest. I didn't have enough almond flour for either one of them so, seeing as there was enough overlap, decided to take from both recipes and come up with my own version. Most of the recipe I came up with borrows from this one . The other recipe I haven't tried yet, only because i haven't had to, i really think mine is a winner. But I pinned it so i can check it out. It's here.

Ok So I'm gonna give you my recipe, and walk you through it with a few notes and pictures.

Meli's Low Carb Pizza Crust

1 1/2 cups of shredded cheese (half mozzarella, half mexican or cheddar) 
1/4 cup almond flour
1/4 cup garbanzo/fava flour
1/4 cup ground flax meal
1-2 tbsp cream cheese
1 egg
garlic powder (optional)
italian seasoning (optional)

Preheat oven to 425 degrees

Ok so first thing you wanna do is put your cheese in a bowl and microwave it till melted. For me it was about 1 min. I tilt the bowl after to get the cheese off the sides and more into one solid mass. It will look like this.


Leave it to cool in the bowl or you WILL burn yourself. Its VERY hot! It's gonna take some time to cool off, maybe like 15min or so. Go on fb, instagram, entertain yourself for 15 goddamn minutes.

Then once its thoroughly cooled, add your flours, egg, and cream cheese. And mush it all together with your hands. The glob of cheese has cooled and you're gonna need to pull it apart with your hands during this process to make sure everything is being incorporated into the cheese base. Its messy but doesn't take long. You will find yourself with a nice ball of dough. Very similar to real dough in that you need to add more flour to make it less sticky.

This is important. Add a little more almond flour (1-2 tbsp) to make the dough less sticky and easier to work with but use caution. The first time I made this it came out awesome! The 2nd time I was a little too liberal with the flour at the end and I noticed the crust had that almond flour texture (which was previously undetected the first time around). You don't want that. If done properly you won't get anything from this crust but a yummy texture and the taste of cheese. I'm even thinking of only doing 1tbsp of cream cheese instead of two so i will have to use less almond flour at the end.

When you're done your dough will look like this. 


Put the dough on a parchment paper lined pizza pan or cookie sheet. The dough is really easy to work with. I was able to use my hands. Also its very forgiving, you can reshape it as needed. I like to have a round pizza so I used my pizza pan and made edges for the crust (i love crust). Don't worry about filling the pan, this isn't a lot of dough. You're gonna end up with a small pizza (but bigger than individual pan pizza). It can feed 2 ppl but you're not gonna wanna share it. Spread it out to your desired thickness. And then sprinkle seasonings on it. Or, you can sprinkle the seasonings on when you're kneading the dough to get more flavor throughout the entire crust.

Pop the pan in the oven until the crust starts to get golden. You'll notice the cheese clumps start browning. I don't have a time for this, ya gotta eyeball it. But I think it was at least 10 min. Maybe 15-20. But ovens vary, so keep an eye on it. Don't leave it too long, remember its gonna cook again with the toppings. Once you like the look, take it out and add your toppings. Then pop it back on the top rack till the cheese melts. Personally I like my pizzas really well done on top so I have to be careful I don't end up with burnt crust.

And voila!! Now go forth, and enjoy. For you can have pizza again!


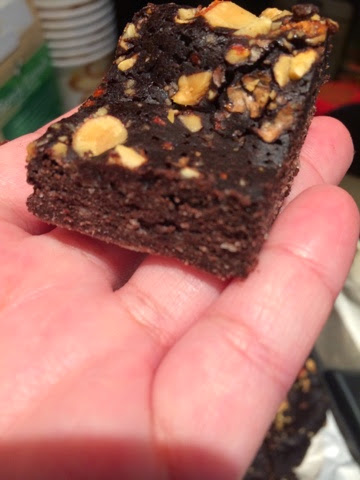
The longer you let it sit and cool, the more structurally sound the slices will be. Yes you can pick these up and eat them no problem!!!! 

My husband is not low carb, he is however gluten free. So pizza is something he doesn't get to eat often. I wanted to try this recipe for me so I got him a gluten free frozen pizza from the store. After trying both he declared mine was better!! That's big coming from him. And last night as I was getting a leftover slice from the fridge, my picky 20 month old took a bite then grabbed it out of my hand and ate the entire damn slice. So there you go. I think that's pretty telling. This recipe is definitely a winner!

The best part? It tastes so good cold the next day! Or an hour later (as your pizza may not make it to the next day). 

Monday, September 22, 2014

update!!!

So I finally bit the bullet and went for the ketogenic diet. what really sealed it for me is when my friend anthony said, don't worry so much about the ketosis, just try to get fat adapted and you'll find yourself in ketosis that way. and mentally, that was just such an easier pill to swallow. i didn't worry about counting my carbs. i worried about getting in mostly fat, some protein and avoiding carbs.

since my last post i've lost 4lbs and 1.5 inches on my waist. i did the keto diet for 2 weeks with no exercise and finally about 2 weeks in i finally felt good enough to get back to workouts. but i was worried that i wasn't able to do what i used to do. my friend (and coach really) anthony told me to keep the workouts short and intense since i don't have the carbs to sustain long workouts. so m/w/f i do weights. i do about 5 reps of 6 exercises and then do 5 sets. then i'll do kettlebell swings and maybe push ups as well. i've recently added some ab exercises that involve dumbells. t/th i do 10 min HIIT sprints (speed 6!!) and then i'll do some tabata finishers. mostly lower body, legs, glutes, squats, lunges, etc etc. i've also done some burpees!! wow! that was a shocker for me. sat and sun i rest bc i need it. but i remain active. i'm just more active in general bc i have so much energy now. i LOOOOOVE being back in a place where i'm working out regularly. its such a good feeling mentally. and although the scale isn't going down i have noticed more definition in my arms and legs. like the fat is melting off and i'm seeing/feeling more of the muscle.

its funny bc i think if i just did the diet alone i would lose weight faster. but i want more than that. i want to transform my body. and thats what weights do. slowly changing the shape. its a long process thats for sure. but its a journey. i have no time limits on this journey other than i want to lose as much weight as i can before next spring bc i really really want this panni removed and for health reasons the closer i am to a BMI of 30 the better my chances are. other than that, no time limit. i've given myself all next year as well to continue my fitness journey. i'm very excited for the future and for what i can accomplish.

i'm very grateful for my health. and the guidance of my coach who has helped me tremendously.

i'm HOPING to be down to pre pregnancy weight by nov. i have 10lbs to go and the scale hasn't moved in 2 weeks. but you know, even if the number isn't the same, as long as i can fit into my old clothes, thats all that matters.